(Click here to go back to lesson 4)
In this lesson (5 of 7) you're going to learn how to setup branding for your videos in Brivvio.
You only need to set up your branding preset once. It automatically applies to all future videos, and you can update it any time.
Let's look at the branding settings...
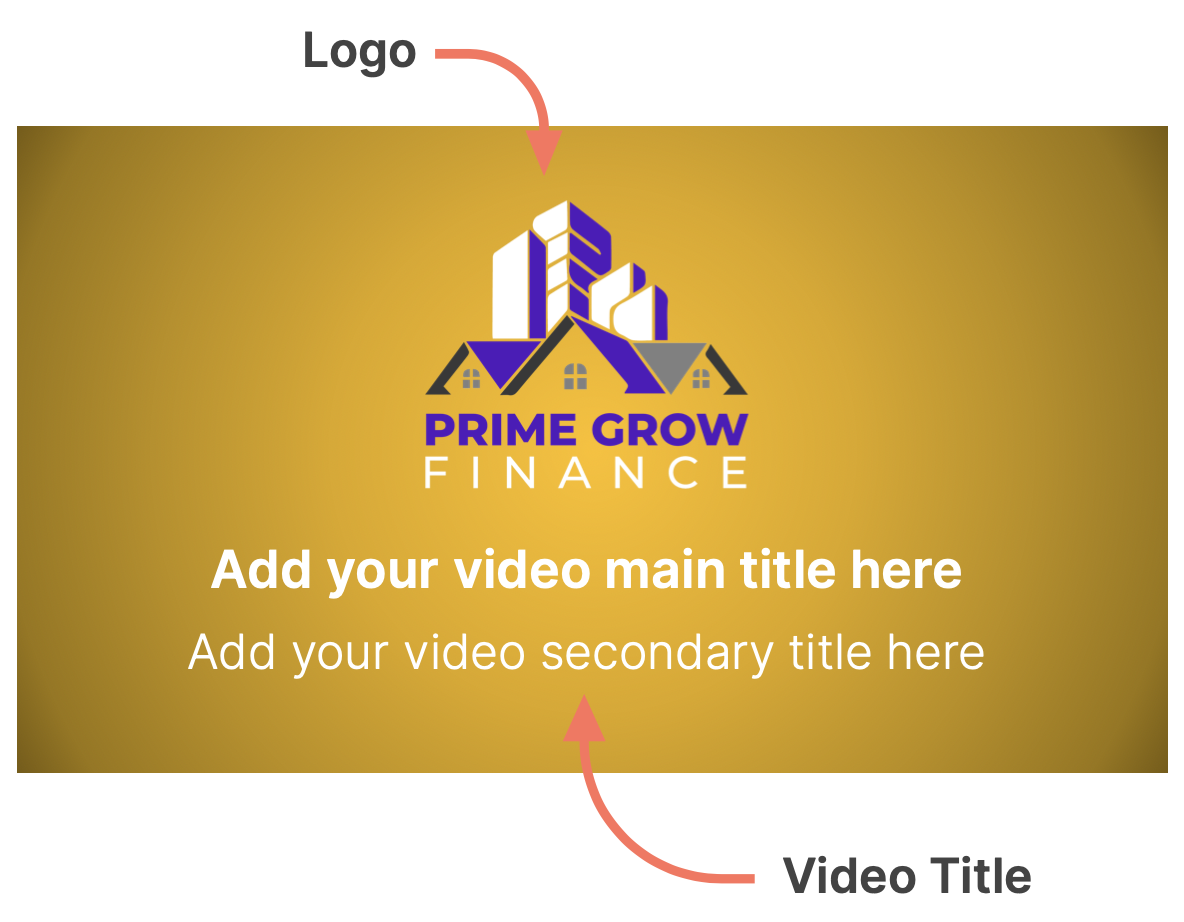
At the start of your video, will appear the Video Title. This contains your logo and two lines of title text over a background colour of your choosing. You can choose the text colour and font, and add a background texture.
Your choice of colours and background texture will automatically apply to all elements throughout the video, giving your video brand consistency throughout.
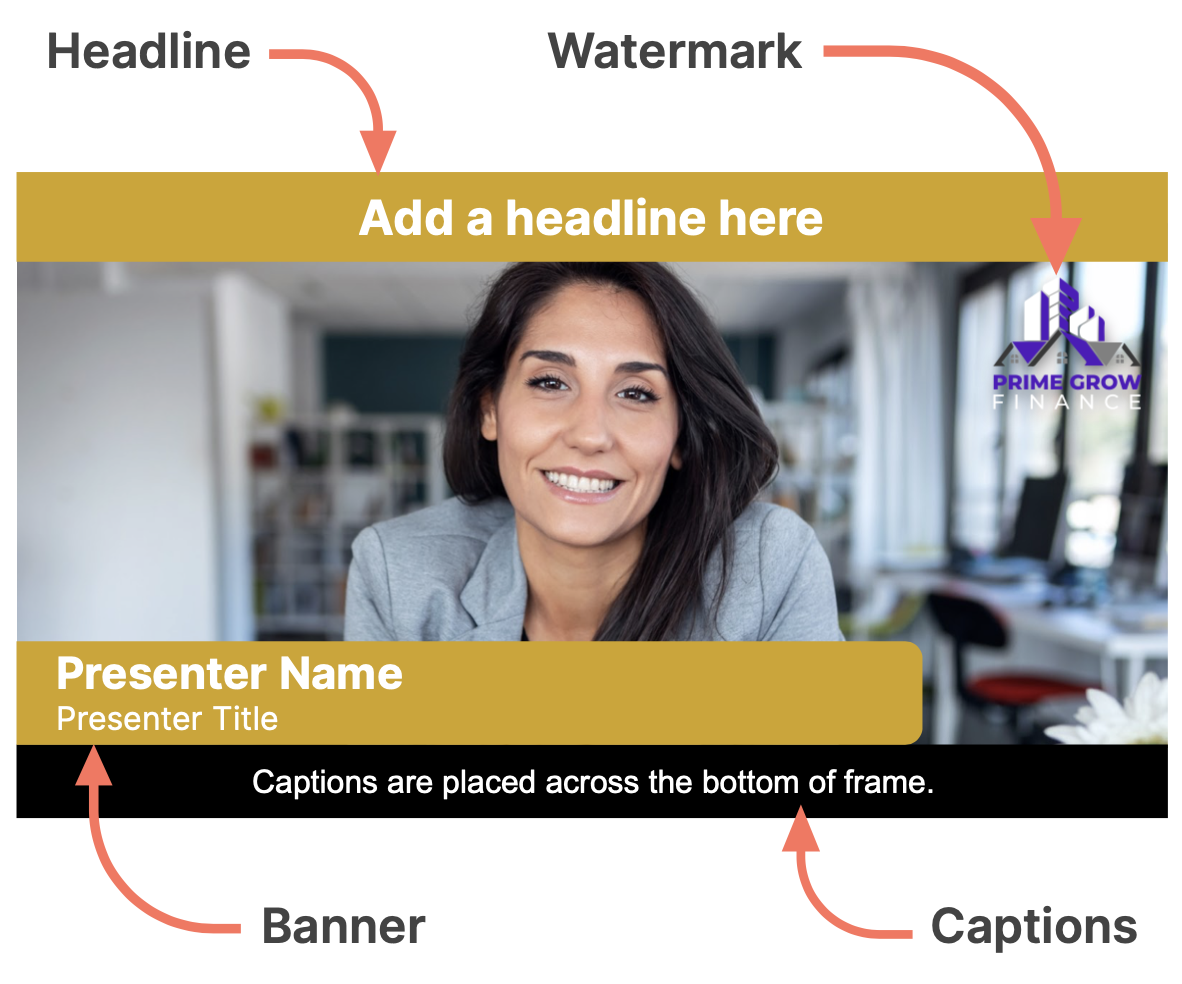
After the opening video title, a banner will appear for several seconds, containing two lines of text, for your name and title. You can also control the roundness of the corners of this banner.
Your logo will automatically appear in the top right corner of your video. Note: This is only available on your free trial or with a paid subscription.
You can also turn on a headline that will appear throughout the entire video. and edit the text that will appear in the headline.

At the end of your video, the Call To Action will appear. This contains your logo again and two lines of title text for your call to action and website address (or other contact info).
If you have a Teams Business subscription, then you will also be able to turn on and edit a Disclaimer, which appears across the bottom of the end of your video.
Each of the branding features above can be toggled on or off, section by section, to get exactly the look and feel you're after.
So how do you get started setting up your branding?
Your branding is contained in Branding Presets. Depending on your subscription plan, you may be able to create more than one Branding Preset.
To open your branding preset library, tap the Presets Button located at the top right of the screen.
![]()
This will open the Preset Manager; a carousel of all branding presets available to you. From here you can swipe through and select from available presets, edit their settings. You can also create, delete and duplicate presets buy tapping the icon in the top right (three dots in a row).
To edit the settings of a preset, tap the Preset.
This will open the Preset Editor, showing you all the settings that you can edit, separated into sections as follows:
- Video Title
- Banner
- Call To Action
- Headline
- Logo
- Fonts
- Colours
- Watermark
- Background
- Caption Settings
- Disclaimer
The top half of the view will loop the current branding preset and show you any changes you make in the settings below. Tap Save in the top right corner to save your changes, or cancel to go back to how your preset was before you started editing.
PRO TIP: When importing your logo, use a PNG image file with transparent background (alpha channel). If your logo file does not have a transparent background, then you may end up with a solid box around your logo. Using a PNG file with transparency, will mean that your logo will sit nicely over whatever background colour you choose in Brivvio.
Next Lesson...
In the next lesson (6/7) we'll look at some of these Brand Preset Settings in a bit more detail.
Click here to proceed to Lesson 6/7 (Customising your Brand Preset settings).