(To go back to lesson 2 click here.)
In this lesson (3 of 7) we're going to look at playing back your video in Brivvio, editing format of your video, so that your videos will be in the perfect format for any destination or social media platform.
By now, you've likely created a video in Brivvio and discovered the Review Mode screen...
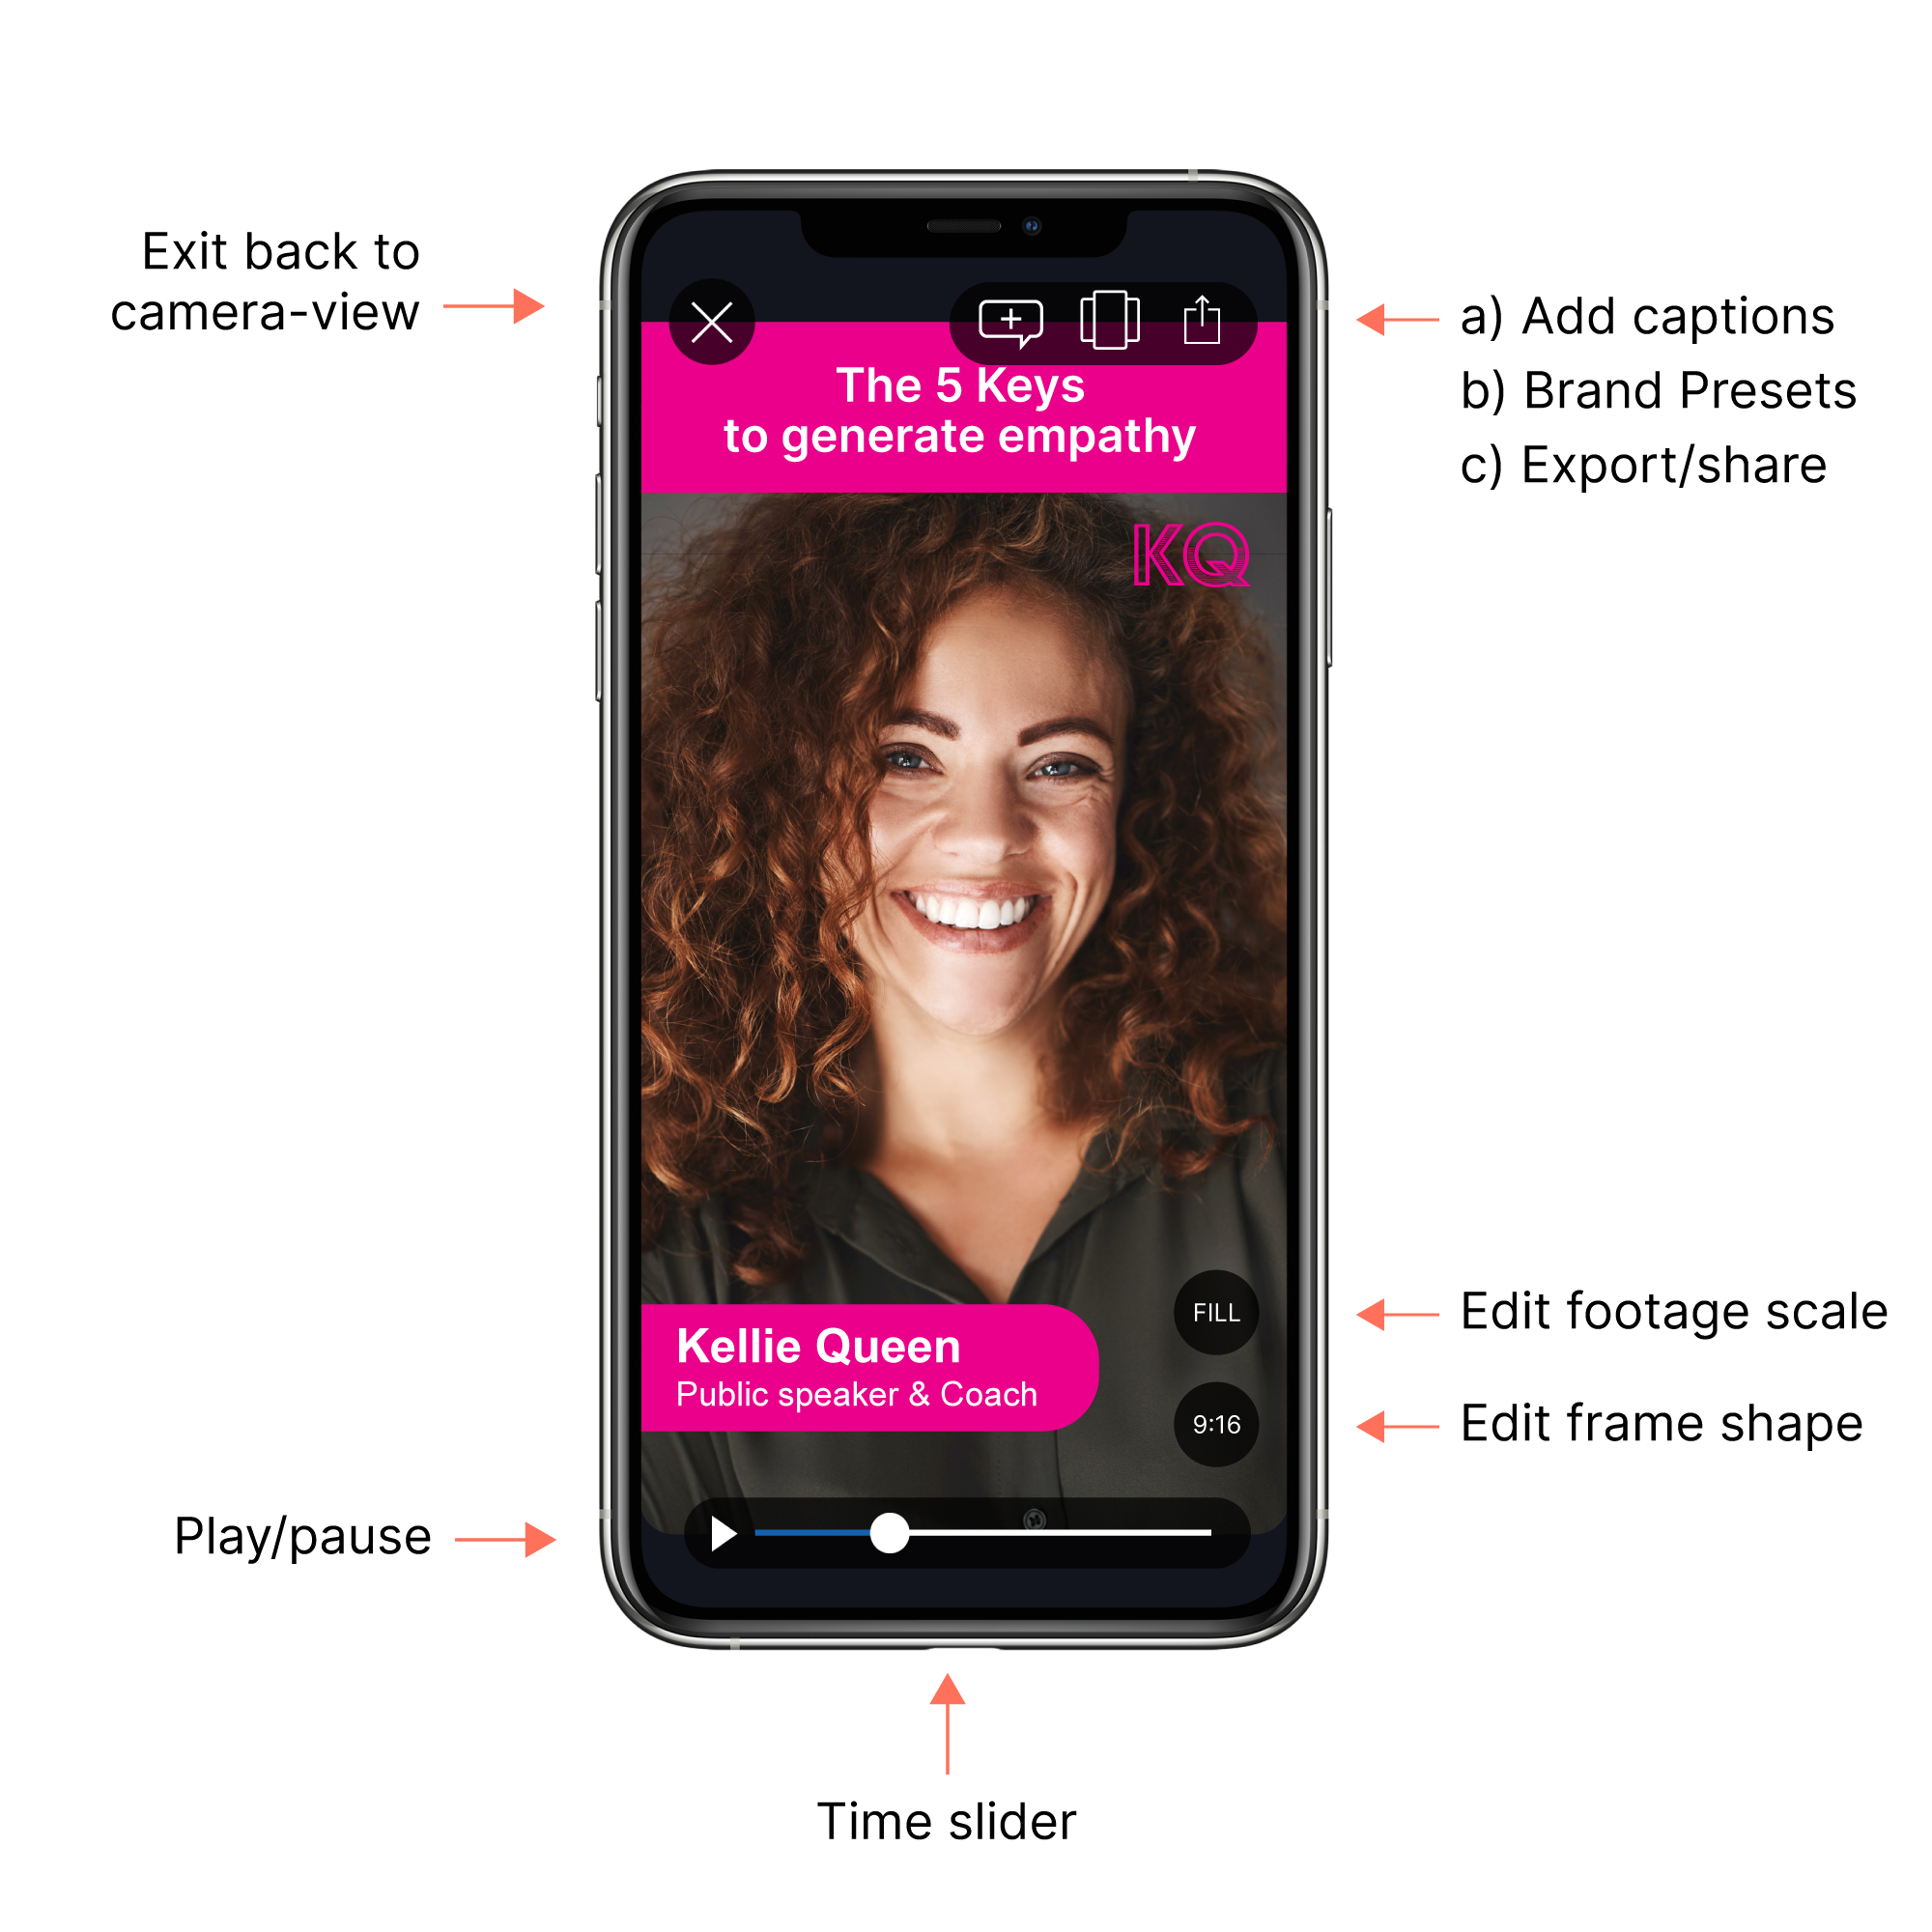
The Exit button in the top left will take you back to the Camera View. Don't worry though - you can always re-load your most recently recorded video.
The Playback bar across the bottom is self explanatory. You can play or scrub back and forth through your video in real-time.
The Aspect Ratio button (frame shape) in the bottom right lets you toggle between different formats. This controls the overall shape of your video (the aspect ratio) that will be exported from Brivvio. You can use this button to export multiple versions of the same video in different aspect ratios.
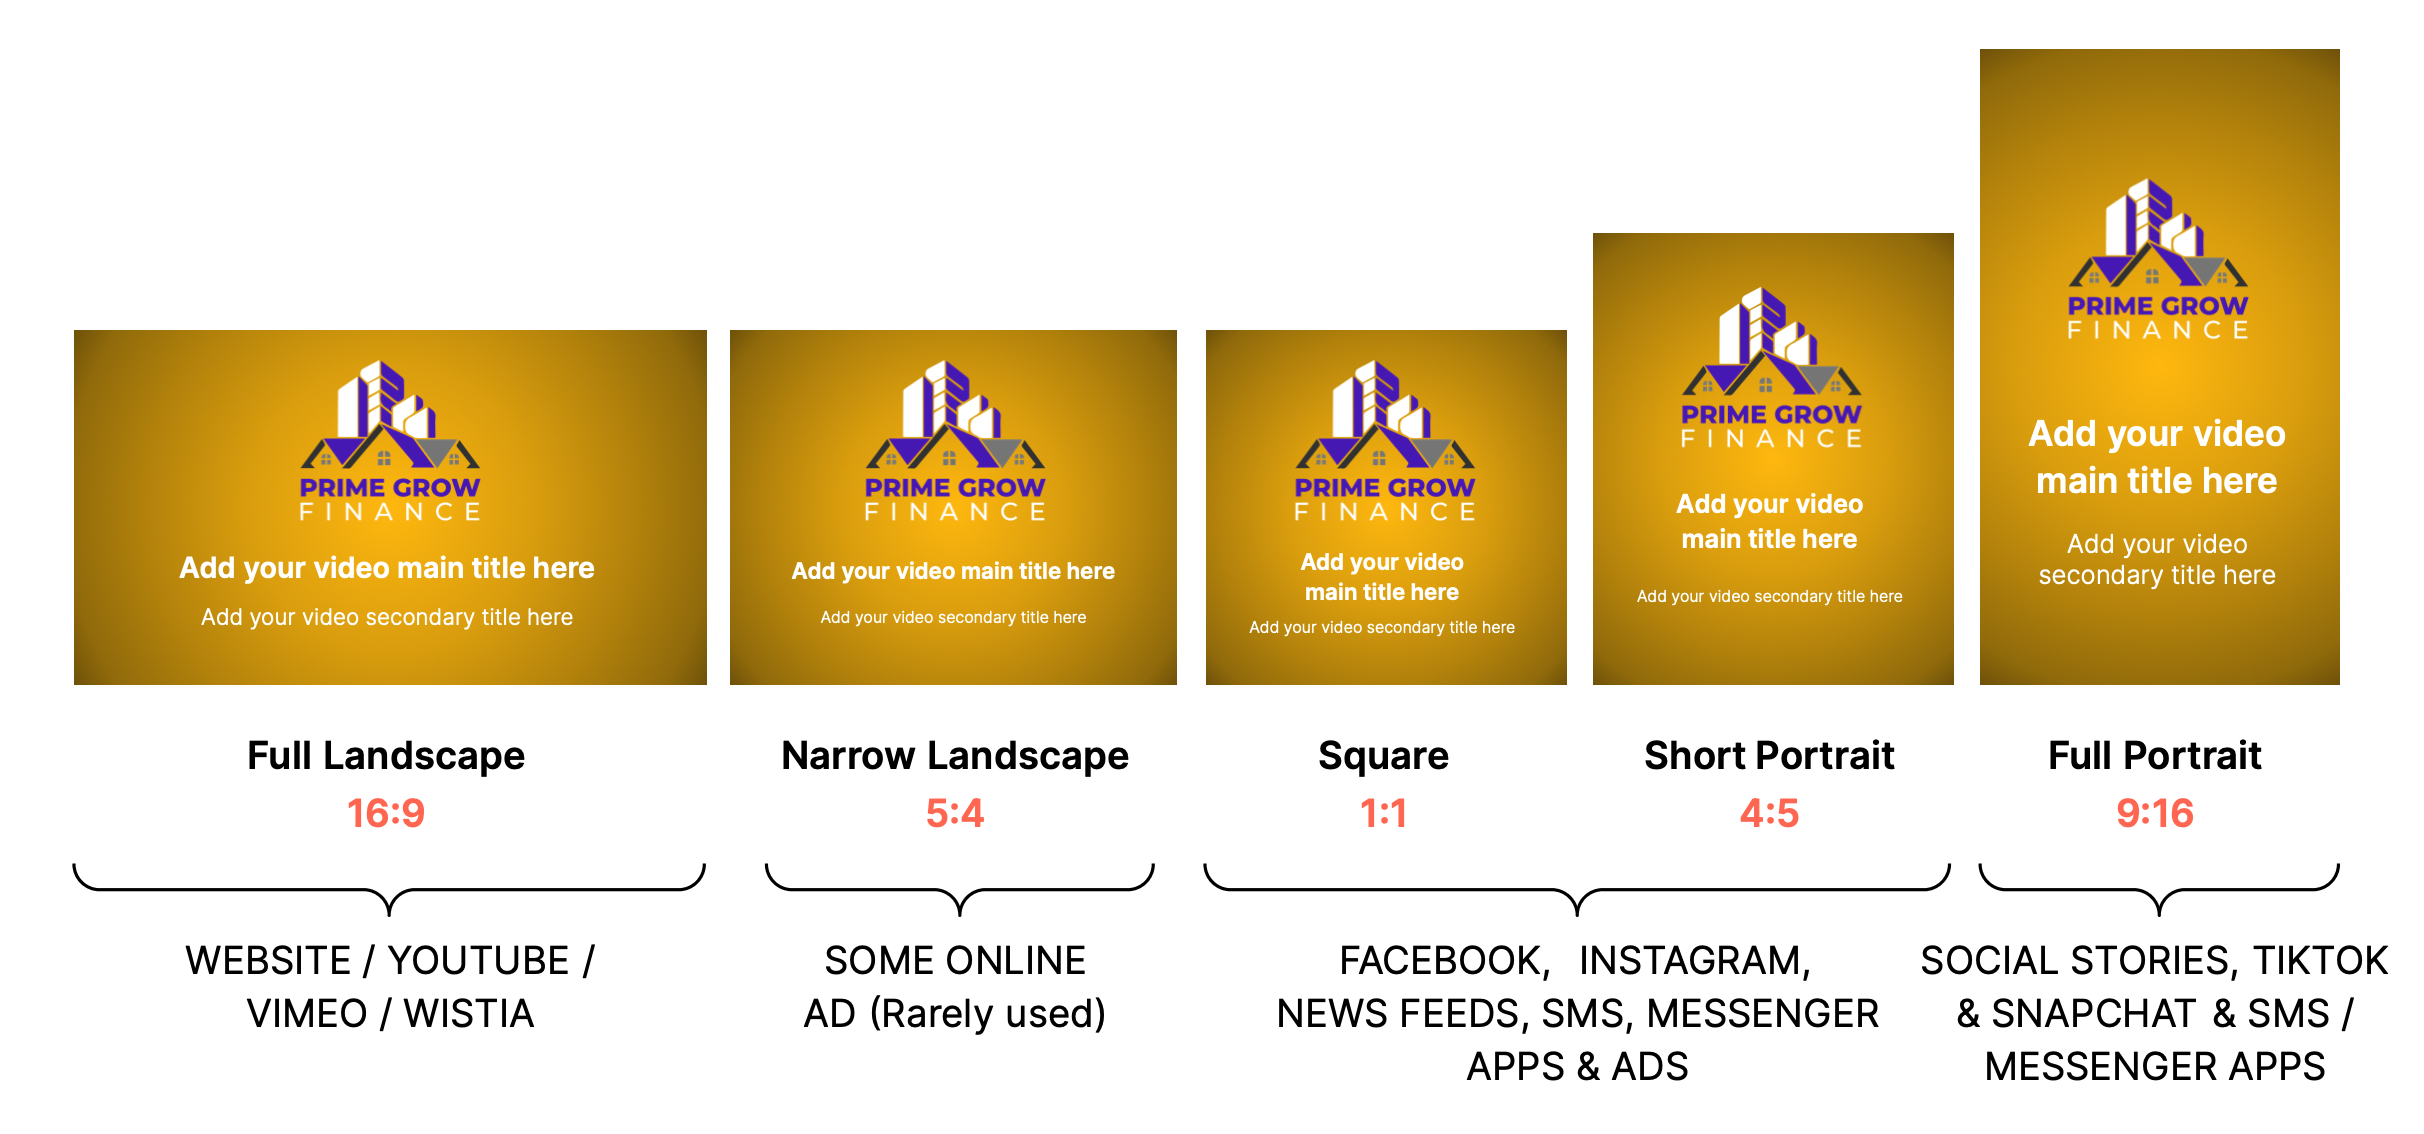
To get the most engagement from your audience, it's important to export your video in the most appropriate format for the platform you'll be sharing it on.
Here is a quick guide to common Aspect Ratios, and their uses...
The Footage Mode button (scale) in the bottom right lets you switch between FIT mode and FILL mode.
FIT will make sure the entirety of your recorded video fits inside the Frame. FILL will make sure that your video footage fills the frame up completely.
Experiment with this button, while also changing the Aspect Ratio, to see how they work together, and the different types of video you can create.
In tomorrow's email we'll look at the first of those important buttons in the top right -
Next Lesson...
In the next lesson we'll start looking at those important buttons in the top right!
In lesson 4 you'll learnhow to automatically add captions, so that you can increase the potential reach of your videos by 900%!
Click here to proceed to Lesson 4/7 (Playback, format and adding captions).